Tuesday 30 September 2014

A Latchy Link Up

The other day Linda posted about all the different latches at her place and I thought it was such a great thing to post about.
Like Linda we have cone up with a few free, recycled and creative latches.

There are the chicken pen gates
Gate 1

The bolt on this came from something else and we bent it then added it to our home made gate


Gate 2

This is an actual gate chain but we have modified the top if a star picket (metal fence post)
to make it so it can latch over


Gate 3

The rope latch


Gate 4

Another rope latch on another home made gate


The gate into the back paddock which is also where we bring in the fire wood after driving through the paddocks.

Another home made gate and an old gate chain that is wired to the gate and held
in place by a carabina


The gate into the neighbours paddock

This is just a wire loop that holds a wire gate to the post by looping over the top


The gates between the paddocks
Gate 1

Another gate chain that has a carabina attached.  For a quick shut of the gate it is loop over the wire loop
but you can also lock the carabina through the chain.


Gate 2

This is what is called a cocky gate latch

The side gate

A simple s hook and a bit of chain does the trick here
There are also a few gates with proper gate latches on them but over all very few of our gate latches have been purchased and they all do the job just fine.
When doing this I also noticed that we have a lot of home made gates but I think that is a whole different post.

What sort of locks and latches do you have at your place?

Monday 29 September 2014

The Weekend Kitchen - Herman Style

Over the weekend I finally got to make my first Herman the German Friendship Cake.

When reading the recipe I suspected that the cake would be too sweet for our tastes but I thought I should make it as per the recipe to start with and modify it from there.

Well I was right it was too sweet for my liking but that is not to say it is not tasty because it is.  In fact the cake really moist and the inclusion of the fruit made it much more interesting.  I used plain yogurt to tone down the sugar but I will make some adjustments next time I make it.  I also cooked mine for longer at only 160 degrees fan forced.


Overall I thought it was very tasty and I really liked the big chunks of apple.  I am looking forward to experimenting with some of the other flavour combinations.

What flavour do you make?

Thursday 25 September 2014

Awsome Vegetarian Black Bean Nachos

Something we have been focused on this year is eating more meat free meals. We are both meat lovers and neither of us would choose to be a vegetarian. We raise much of our own meat and where we don't we try to make ethical choices. But like most things in life you need to find a balance and for us this means aiming for at least one meat free dinner per week.  Sometimes we miss the mark and some weeks like this week we had two meat free dinners, an omelette and black bean nachos.

The omelette used eggs, silverbeet, spring onions and asparagus from the garden along with capsicum, mushrooms and cheese.  With the glut of eggs we have at the moment it made a quick, healthy and easy meal after a long day at work.

The nachos recipe took a bit longer but was extremely tasty (so tasty that there were no photos taken) and is something we will eat again.  I used 1/2 cup of dried black beans that I had soaked and precooked but you could also use a tin of black beans instead.

Vegetarian Black Bean Nachos

2 Tbsp Olive Oil
1/2 Cup Dried Black Beans
1 Brown Onion finely diced
1/2 Capsicum
1/2 Large Green Chilli finely diced
3 Cloves of Garlic, crushed
1/2 Tsp Cayenne Pepper
1 Tsp Ground Cumin
1 Tsp Oregano
1/2 Tsp Smoked Paprika
1 1/2 Cups of Diced Tomatoes or 1 tin of Diced Tomatoes
1/2 tsp salt
Chopped Coriander leaves to garnish

In a large saucepan cook the onions in the oil over a medium heat for 5 minutes then add the garlic, chilli and capsicum and cook for another 2 minutes.  Then add all your spices (except the salt) and cook for 2 minutes stirring all the time to cook out your spices.  Add your beans, tomato and salt and cook until the mixture has thickened/reduced to your desired consistency.

Serve garnished with coriander with your choice of corn chips, taco shells guacamole, sour cream, jalapenos, fresh tomato salsa, salad or anything else you fancy.

This recipe can easily be doubled or tripled.  You can leave out the chilli if you do not want any heat or increase it if you want it hot.

What vegetarian meals have you made lately?
Do you have a favourite vegetarian meal?


Wednesday 24 September 2014

Collecting And Using Animal Manure

When you own livestock you have access to a very valuable commodity.  Their Poo.

I doesn't matter if you have cows, horses, donkeys, alpacas, sheep, goats or chickens they all poo and if you can collect it you can use it to add fertility to your garden.

We like to collect lots of cow poo out of our paddock every few months and fill one of our compost bays. When we last filled up the compost bay it took about 8 wheel barrow loads to fill it.  We then give it a good water an leave it to break down for a couple of months making sure to keep it damp.

The bay to the right currently has a mixed compost in it and to this we add the chicken manure from the chicken house.  We use a layer of wood shavings under their perches to collect all of the droppings on. When we clean out the chicken house we add it to the compost pile and give it a good mix.

Mushroom compost in the left bay
Cow poo in the center
Mixed compost in the right bay

Different types of manure need to be treated differently.  Here is a bit of an overview.

Although lower in organic matter than other traditional manures, alpaca manure has a lot of value in the garden. It does not need to be aged or composted before use and you can spread it directly onto garden plants without burning them. Best of all, it does not contain any weed seeds

Sheep manure is referred to as cold manure because of its low nitrogen content. This makes it an excellent addition to any garden.  Sheep manure can also be used as organic mulch. Because of its low odor, sheep manure can easily be used to top dress garden beds.  It is high in both phosphorus and potassium, essential elements for optimal plant growth.

Horse manure is a good source of nutrients and a popular addition to many home gardens. Composting horse manure can help your compost pile become super charged however horse manure may also contain more weed seeds. For this reason, it is usually better to use composted horse manure in the garden. The heat produced from composting can effectively kill most of these seeds as well as any harmful bacteria that may be present.Fresh manure should not be used on plants to prevent the possibility of burning their roots.

Cattle manure is basically made up of digested grass and grain (depending on what they are fed). Cow dung is high in organic materials and rich in nutrients. It contains about 3 percent nitrogen, 2 percent phosphorus, and 1 percent potassium.  It’s usually recommended that it be aged or composted prior to its use 

Using goat manure in garden beds can create the optimal growing conditions for your plants. The naturally dry pellets are not only easy to collect and apply, but are less messy than many other types of manure. Goats not only produce neater pelletized droppings, but their manure doesn't typically attract insects or burn plants as does manure from cows or horses. Goat manure is virtually odorless and is beneficial for the soil.

Chicken manure for vegetable garden fertilizing is excellent, but there are some things you need to know about it in order to use it correctly. Chicken manure fertilizer is very high in nitrogen and also contains a good amount of potassium and phosphorus. The high nitrogen and balanced nutrients is the reason that chicken manure compost is the best kind of manure to use.  But the high nitrogen in the chicken manure is dangerous to plants if the manure has not been properly composted. Raw chicken manure fertilizer can burn, and even kill, plants if used. Composting chicken manure mellows the nitrogen and makes the manure suitable for the garden.

Do you collect poo from your animals?
How do you use it?

Monday 22 September 2014

The Weekend Kitchen

Over the weekend we were quite busy but I did have time to make another batch of Coriander and Macadamia Nut Pesto (my favourite kind of pesto)which we have been eating a lot of over the last few weeks.

It is getting too hot here to grow coriander in the garden and from now on I will have to grow it in the shade house otherwise it just bolts to seed.  So with this in mind I have been making lots of pesto and if I can keep it away from Hubby I will even get to freeze some.


I kind of make this recipe up as I go along as sometimes it needs adjusting depending on if the coriander has gone a bit bitter from being old and you can reduce the garlic if you don't like a big hit.  You can substitute the coriander for parsley, basil, mint or rocket in full or use a combination of them.  You can also change the type of nuts you use and add chilli for some heat if you like.  Pesto should always be made to your taste but this is the basic recipe I follow.

Coriander Pesto

4 Cups of Coriander
1 Cup of Macadamia Nuts
2 Cloves of Garlic
3/4 Cup Grated Parmesan
1 1/2 Cups of Olive Oil (Plus extra to cover)
Salt and Pepper to taste

Place the coriander, nuts, garlic and parmesan in a food processor and pulse until finely chopped stopping to scrape down the sides a few times.  Then with the motor running add the salt and pepper and then the oil in a steady stream and mix to a paste.
Pack into jars or containers and top with a layer of olive oil before sealing and freezing or refrigerating.

Do you make pesto?  What is your favourite kind?

Thursday 18 September 2014

Trimming Rooster Spurs

Our Rooster 'Big Red' has recently had a pedicure.  It had been a long time since we had trimmed his spurs and they had become a problem as had injured a couple of our hens.

Each of his spurs were about 2.5 inches long and  the last time they were trimmed we used a pair of sharp secateurs and it was not that easy, those spurs were tough.
So this time I had a chat to a fried about how they dealt with rooster spurs and she suggested we us an angle grinder.  Of course why didn't I think of that.
The benefits of and angle grinder are that 1) It is fast 2) It requires very little pressure to be applied therefore the rooster does not try and pull his leg away 3) The cut is very clean 4) You can smooth of any rough edges
5) It is easy

So here is the before photo, just look at that spur.  Yes we are very bad chicken owners to let them get that long.


And here is the after photo (sorry it is blurry Hubby got too close, unless he was trying to photograph the grass in the background) and you will see a tiny little pink spot in the middle which is the blood supply.


We left the spurs about 2 cm long as we were not sure how far down the blood supply went but it did not bleed at all.  I held Big Red and Hubby had both spurs off in about 30 seconds each including smoothing off all the edges.  Big Red did not even move during the process and was straight back to his girls like nothing had happened. But I am glad it was quick as boy is he heavy.  He is a 5 year old New Hampshire and at a guess he weighs about 6kg.

How do you deal with rooster spurs?

Wednesday 17 September 2014

The 2014 Real Food Festival


Over the weekend I attended the Real Food Festival held at Maleny in the Sunshine Coast Hinterland.  The festival is about connecting local food producers directly to customers.
In addition to the fantastic array of local foods to sample and purchase there is a wide rage of talks and presentations that you can attend.

I attended:


I attended a talk about gut health from a man who is a raw food vegan and advocates for an increase in raw food in our diets.  He shared his personal story of having trouble digesting proteins and suffering from a range of health including being 25kg heavier.  I was interesting but it is not the type of diet I would choose.

Scott Mathias talking about he raw vegan lifestyle.

I also attended a very entertaining cheese making presentation from Carole Willman who used to own 'Cheeselinks'.  She shared some really interesting information including the fact that in Australia because of our labelling laws camembert and Brie are technically the same cheese and by law a producer could make one big batch of cheese and label half as camembert and half as brie and this would be totally legal.  Are you surprised?
In reality Cmambert should be in small rounds (and if you are in France only made form 3 breeds of cows that come from only a couple of specific regions) but brie should be made in a bigger wheel (like a dinner plate) and this means that the brie says moister and the drier camembert takes on a slightly different flavour because the ration of air to total mass is smaller.

Carole from Cheeselinks

I also had the oppertunity to sit down for an hour and have a 1 on 1 chat with a Farmer who runs an organic CSA (Community Supported Agriculture).  It was really interesting to talk to him about it as it is something Hubby and I have talked about for doing when we move to NZ.

I also made a whole lot of purchases some for us and some for gifts and overall had a lovely day out meeting up with other like minded people.

What did you get up to on the weekend?

Tuesday 16 September 2014

Herman The German Has Come To Stay

Over the weekend we caught up with some friends for lunch and when we left my friend gave me some German Friendship Cake Starter also know as a Herman Cake.

Herman the German Friendship Cake is a sourdough cake starter that has been passed for person to person and works in a similar way to a chain letter in the fact that you pass it on to others.  You can read all about it Wikipedia or on this website.  Herman even has his own facebook page.

Herman in his bowl
So I brought Herman home and since he had been stored in my friends fridge (some of the instructions say not to, but then on another page of the same website it says you can) I poured him into a bowl and covered him with a tea towel secured over the bowl with a rubber band.
Because my friend only gave me a small portion I only fed it a 1/4 of what was recommended, I also fed it on the first day to get it going and then I will start counting the 10 day cycle from there (I am sure it will be fine in our warm climate to do this).
So in just over a week from now I will be doing my first bake.  I will also be on the look out for some friends who might a portion of Herman.

Have you ever made a sourdough friendship cake or been involved with passing Herman on?

Friday 12 September 2014

Farms With A Future - A Book Review

I recently came across this book Farms With A Future - Creating and growing a Sustainable Farm Business by Rebecca Thistlethwaite and I was immediately intrigued.  One of the thoughts we have had for our land in New Zealand when we move there is to grow food for sale so I thought I would start to get some more knowledge under my belt about farming as a business.

Right off the bat I want to say that this book is a fantastic read, and even if you have no interest in farming as a business yourself, but are interested in learning how farms can be run in a sustainable manner and sharing personal stories about innovative farmers making a difference in their communities, then this is a book you should look out for or request at your local library.


This book does not focus on agricultural side of managing and running a farm but instead focuses on the specifics of running a farm as a business.  Rebecca has been a farmer herself and in this book she shares all of the wisdom she has learnt over the years through trial and error and the knowledge she has gained for the many books, websites and other farmers she has met along the way.

The book is set out in the order you need to be doing things as you consider setting up you farming business. Each chapter provides detailed information about the things you need to be considering, plans you need to making and considerations before moving on to the next phase in the businesses evolution.  There are plenty of tips, creative solutions and plenty of excellent advice.
The chapters are concluded with take home messages of the key points covered in the chapter which makes for easy reference if you want to go back and check anything.  Linking back to the topic in each chapter as a case study is also a personal story from a farmer who shares their advice, key tips for success and shows how it all gets put into practice.

The farmers interviewed throughout the book run a variety of businesses including orchards, dairy cows, goats, poultry, market gardens and everything in between.  There are big farms, small farms, people who have farmed on land they owned, leased or borrowed.  All of these farmers are innovative and constantly looking for efficiency in both their production models and finances while not causing degradation to the land on which they depend for their livelihoods.

The chapters are titles as follows:

  1. For the Beginner
  2. Identifying Your Market Niche
  3. Finding and Securing Land
  4. Financing the Dream
  5. Farm Planning for Success
  6. Equipment and Infrastructure
  7. Soil and Water Management
  8. Harvest and Processing
  9. Marketing and Relationship Building
  10. Record-Keeping and Regulatory Compliance
  11. Accounting and Financial Management
  12. Human resources and Family
  13. Add-On Enterprises and Value-Added Products
  14. References and Resources

This book is written and based in America, so there are a few things discussed (such as tax forms) that will not apply to farms in other parts of the world, but this is such a small part that I would still encourage anyone contemplating a farming enterprise to read this book.
There were so many things that I took away from this book that I think I would apply to a farming business. I feel that it really arms the new farmer and the farmer who wants to to make some changes, with practical steps they need to take and consider to turn their farming dreams into a successful and sustainable reality.

Overall I think this is one of the best books I have read related to the practical considerations of running any sort of farming enterprise and would recommend it as a great read to any one looking to farm them selves or be inspired by farmers doing a great job or running their business while caring for the land.

Thursday 11 September 2014

Growing Your Own Kombucha SCOBY

So you have decided that you quite like kombucha and you think you might like to start brewing your own.
But you don't know anyone you can get a SCOBY from and you are not sure you want to spend the money buying one.  Well not to worry you can brew your own.
The first thing you need to do is go out and buy yourself a nice big bottle of kombucha. You will need at least 500ml of raw kombucha.  When you are choosing your bottle of kombucha get one that has floaty bits in it if you can because these floaty bits a little bits of SCOBY culture/mother.

Once you have your kombucha at home you need to pour it into a very clean glass jar along with 2 tablespoons of sugar that have been disolved in 1/4 cup of boiling water and cooled.  I suggest you wash it and rinse it well then add a few tablespoons of vinegar swish it all around then give it a rinse with water again.
You then need to cover the top of the jar with a clean piece of cotton fabric like a hankercheif and leave it on your kitchen bench.
Over the next few weeks a SCOBY will begin to form on the top of your kombucha.  It may start of looking like a mold spore floating around in the tea and gradually it will form a thin skin over the top.

The SCOBY starting to form

Over a period of about 3 weeks (depending on the temperature) the SCOBY will thicken up and once it gets to between 1/2 and 1 cm thick it is ready to use.

A new SCOBY still building the top layer.  All the pale spots will
eventually join up

As your SCOBY forms it can be anything from a pale creamy colour to a darker brown and sometimes it can be splotchy too.  Be patient and don't freak out that something has gone wrong, just wait.  If it has gone wrong it has gone wrong, and there is no harm in waiting a bit longer to see what happens.  If it turns out that it does grow mold of any sort you should throw the whole lot away and start again.

Once you have you home grown SCOBY you can make your first batch of kombucha.  Because your SCOBY is just a baby you should only make a third of a batch of the recipe I posted here.  You can then gradually increase your brew by a third every second batch until you reach the full quantity.

And that's it.  So easy just a little patience required.
Have you brewed your own SCOBY?  Are you tempted to give it a go?

Wednesday 10 September 2014

Kombucha

Kombucha is an ancient fermented beverage that is believed to have started in China and Russia and then spread around the world.  Kombucha is made by adding a sweet tea to a Kombucha mother/fungus and then being left to ferment.
The mother is known as a a SCOBY which stands for a Symbiotic Culture Of Bacteria and Yeast and it is a living organism.  Once fermented the Kombucha has probiotic properties just like other fermented foods and drinks such as Kvass, Sauerkraut, Yogurt, Kefir and Kimchi.


Kombucha is a health giving beverage that claims to detoxify the body, energise the mind, prevent illness and restore good health.
The Kombucha SCOBY works on the sugar and tea to produce acetic acid, lactic acid and small amounts of a detoxifying substance glucuronic acid.
Glucuronic acid is normally produced in the liver and assist with the neutralising and removal of toxins from the body.  The additional glucuronic acid is said to aid the body in its natural cleansing process, boost the immune system and be a proven prophylactic against cancer and other degenerative diseases.

But the best reason for drinking Kombucha is that it is a delicious, refreashing and epervesent drink that is slightly sweet (depending on how long you brew it for) and acidic and so much better than soft drink.

Kombcha is brewed using just the SCOBY and sweet tea (green, black or herbal) but you can add herbs (non oily ones), spices and fruit juices to create a range of flavours.
If you are interested in making your own Kombucha it is really easy but you will need a SCOBY which can be purchased on line, gifted from someone who is already brewing Kombucha or you can brew you own (more about that tomorrow).

Kombucha should be brewed in either a glass or stoneware with a non toxic glaze vessel  with a breathable cover.  You need the open top so that you can get to the SCOBY and remove it.  The reason you need to be able to the SCOBY is that it grows and multiples with every batch you make so you need to be able to remove them when the build up.

The basic recipe I use is as follows:
Take a 2 liter jug and add 3/4 cup of sugar.  Boil your kettle and add approximately 3 cups of boiling water to your sugar and still until dissolved.  Then add 2 black tea bags and 1 green tea  and leave to brew for 10 - 15 minutes.  Remove your tea bags and top up the jug with cold water to the full 2 liters.

The 2 liters of Tea Mix


Add you sweet tea mix to your kombucha vessel that contains your SCOBY and at least 1 cup of kombucha and leave to brew.

About a cup or so left from the last batch.
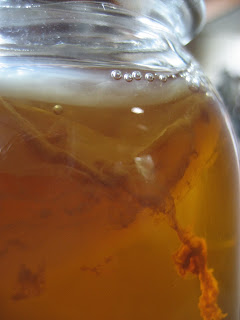
The brown stuff on the bottom are dead yeast cells, you can clean
them out but as you can see they sit below my exit spout.

The number of days it takes will depend how warm it is, here in QLD mine can take as little as 3 days when it is warm.  It is best to judge when it is ready by taste.  You want it to taste only slightly sweet and more like cider.  It will have a slightly apple cider vinegar taste when brewed but if you let it go too long it will taste very much like apple cider vinegar and you will probably want to use it for something other than drinking.
Once mine is brewed to how I like it I bottle it in large glass bottles and store in the fridge.  The bottles help capture all the little bubbles and it remains slightly fizzy as you use it up.
Once I have bottled it I get another brew on the go.

So what does a SCOBY look like?  Well it looks like a rubbery floaty thing and can be pale or even a bit blotchy

The SCOBY floating in the Kombucha

As I said before the SCOBY multiplies and you often need to remove some of it.  If you need to handle your SCOBY wash your hands well with plain soap and water and rinse well.  Have a clean plate ready to place your SCOBY on once it has been removed.
Once you have removed your SCOBY will see that there are layers of SCOBY, some thick, some thin, and you can peel them apart.


The layers of SCOBY separate easily.

You only need one to add back in so separate one off and add back into your vessel.

One layer ready to be added back in

Back in my Kombucha Crock ready for a new brew.
With any extra SCOBYs you have there are a range of things you can do with them including give them away to friends, adding pieces to a smoothy, making a face mask, drying them into a jerky, feeding them to animals or adding to your compost or worm farm, just check the internet for ideas.
Tomorrow I will share with you how to grow you own SCOBY.

Do you drink Kombucha?
Do you have any tips to share or flavour combinations you like?

Tuesday 9 September 2014

The Garden Whip Around

It has been a couple of months since I gave you a bit of a tour of what is growing in the veggie patch so here are a few (and a few more) photos.

There is self seeded coriander growing all over the place and I have plans to make pesto this week.  I also have a few lettuce, some basil, a capsicum, an eggplant and zucchini in this bed too.


I have also grown a whole lot of broccoli cow food since no heads have formed.  I am holding out in hope that something might happen but as the days warm up I think that hope is lost.  This bed also has some tomato seedlings at this end and at the far end there is garlic.


The next 3 photos are out in the back garden there is fennel, lots of parsley, beetroot, more brassicas/cow food, lots of silverbeet some peas (that are really stunted this year for some reason) and some more summer plantings.


Out the back the summer plantings are so far more lettuce, zucchini, basil and capsicum.  Once some of the brassicas/cow food comes out I will get more things in.


There is is coriander flowering in many of the gardens getting ready to go to seed and plant out the next round of coriander for me.


The mulberry is putting on all its foliage again an is forming berries too.


The quince is flowering.


The asparagas is coming up and grew at a great rate over the 2 days we were away over the weekend.


From the back garden I picked a stack of veggies for dinner.  I use all of the silverbeet, parsley and peas from my basket in the quiche for dinner.  While the oven was on I roasted the beetroot for lunch salads and then washed the young leaves to keep for the salad as well  and to use in smoothies too,  The big leaves went to the chickens who were very pleased.


So whats growing in your garden?

Monday 8 September 2014

Reducing Our Winter Power Bill

Throughout winter we had our fire place burning almost 24 hours a day.  The main reason it does not go out is the fact that I work from home and when you are sitting still in front of a computer you can feel much colder than if you are busy and moving around.
Over winter we made use of the fact the fire was going and used it to to do some of our cooking which is not something we have done until this year.  In the past I had tried but I found the fireplace did not get hot enough and the food took hours to cook.
But this year the thought hit me, it didn't matter if it took hours to cook as long as I planned it that way.
So this year I took a different tactic and planned ahead.  Instead of using my slow cooker like I did last winter I cooked on the stove.   I found the best way to make any kind of meat dish was to brown the meat first in the pan I am going to cook in then add all the rest of the ingredients and place on the fire for the day and let it slowly cook away.  I also trialed speeding up the process by bringing the entire pot to the boil on the stove first then transferring to the fire to be left to cook for the rest of the time.
All of the curry's I made this way were lovely and tender.


I monitored our power usage and it was slightly lower that last winter but I am not sure how much I can contribute to this method of cooking.  However it was easy to just get dinner ready and forget about it for the rest of the day.
Now that we are heading into the warmer months and our fire will be getting used less and less it is time to go back to cooking in the slow cooker and on the stove top for curry so we do not heat up the house.

Did you cook on your wood stove over winter?

Thursday 4 September 2014

Orange and Almond Cake

There are lots of different recipes out there for Orange and Almond Cakes but I like this one as it is moist and not overly sweet.  It takes a while to make but is not difficult and keeps really well.


Orange and Almond Cake

2 Large Oranges
6 Eggs
1 Tbsp Orange Liqueur
1 Cup Castor Sugar
300 Gm Ground Almonds
1 Tsp Baking Powder

Orange Syrup (Optional)

2 Cups of Orange Juice
3/4 Cup Castor Sugar
1/4 Cup of Sweet White Wine

Boil your oranges in water for 2 hours in a covered pot.  Once they are very soft drain off the water and puree the oranges in a food processor, blender or with a stick blender then cooled the pureed oranges.
Grease and line a 23 cm round spring form tin.  Pre-heat your oven to 180 degrees Celsius.
Separate your eggs being careful not to get any yolk in the whites.  Place the yolks in a bowl with the castor sugar and liqueur and beat until the mix is pale and frothy.  Then add you orange puree, ground almonds and baking powder and mix until combined.  Mean while in a clean bowl beat your egg whites until they are stiff.
Take 1/3 of your egg white mix and add it to the orange mix and stir through to lighten the orange mix.  Repeat with the second 1/3 and then the final 1/3 folding through so you retain as much air and lightness as possible.
Pour into your tin and bake for 1 hour.  Remove from the oven and cool completely in the tin before removing.

To make the syrup heat all the ingredients in a pan over a medium heat.  Once the sugar has dissolved simmer for 30 minutes or until the syrup has reduced by half.

Once you have made your syrup serve up a slice of cake with a drizzle of the syrup and a dollop of greek yogurt.

Wednesday 3 September 2014

Beef Sausage Rolls

These sausage rolls are such an easy meal to make and while they are not something we would eat that often they are much tastier than anything you can buy.
The recipe below is for beef sausage rolls but I have also made lamb ones and plan to try pork in the future. All I do is change the spices to suit the meat but it is really up to your tastes and what you like.
It is important to make the meat mix ahead of time so that the breadcrumbs have time to soak up any excess moisture and you do not end up with soggy bottoms on your sausage rolls.  I have used the square sheets of brought pastry here but feel free to make your own.


Beef Sausage Rolls

1 kg of Beef
2 Brown Onions finely diced
2 Cups of Dried Breadcrumbs
1 Egg
1/2 Cup of Milk
1 Tsp Celery Salt
2 Tsp Smoky Paprika
1 Tbsp Fennel Seeds
1 Tsp Cayenne Pepper
1/2 Tsp Ground White Pepper

Beaten Egg to seal and brush the top
4 Sheets of Frozen Puff Pastry

Add all of the first set of ingredients to a large bowl and mix thoroughly using your hands so that all of the spices and breadcrumbs are evenly distributed.  Press the mix down firmly in your bowl so that it has a nice flat surface.  Cover and chill for at least 2 hours.
Preheat your oven to 200 degrees and remove your pastry from the freezer.  Lay the sheets of pastry out along your bench and allow to defrost.  Beat your additional egg in a small bowl with a fork and set aside to brush the pasty with.
Remove your mince from the fridge and use a bread and butter knife to cut the mix into quarters.  Add a quarter to each pastry sheet forming a log shape along one edge.  Brush the other edge with the beaten egg and roll into a log.  Repeat and then cut each log in half.  Brush them all with beaten egg and sprinkle with sesame seeds if you want.  Bake for 30 minutes turning your trays once during cooking to ensure even browning.

When I made the lamb ones I used the following spices and we were really happy with the result.
1 Tsp Celery Salt
2 Tsp dried Mint
1 Tbsp Sumac
1/2 Tsp Ground White Pepper


Do you make your own sausage rolls?  What flavour do you like?

Tuesday 2 September 2014

Slow Living August 2014

Linking up with Linda who has taken over from Christine in hosting the Slow Living Nine.  I am so glad this is continuing as it is great to hear what everyone is up to.

Nourish -Make and bake as much as possible from scratch. Ditch over packaged, over processed convenience foods and opt for 'real' food instead.
With my self imposed "How little Can You Spend Month" everything except the one meal I ate out with a friend was made from scratch.  We have heaps of eggs and silverbeet so quiches continues to be on the menu in its many forms.


Prepare - Stockpile and preserve. Freeze extra meals or excess garden/market produce. Bottle/can, dehydrate or pickle foods to enjoy when they are not in season.
Our stockpile took a bit of a hit during the month as we tried not to spend more than $50 for the entire month.  But right at the end of the month we were given some oranges so I made a batch of marmalade.


Reduce - Cut down on household waste by re-using, re-purposing and repairing.
I am not sure we did anything specific that I can think of that fits this category this month, I am sure there was something but nothing springs to mind.

Green Start (or continue!) using homemade cleaners, body products and basic herbal remedies. The options are endless, the savings huge and the health benefits enormous.
Just the usual happening on this front.  I have a catch of citrus cleaner on the go but now that I have all these oranges I will be getting another batch started.

Grow plant/harvest. What's growing this month? What's being eaten from the garden?


The garden is producing lots of Silverbeet and herbs, we have harvested a couple of purple cauliflower but it is now getting warm and I suspect the rest might not come to anything and get fed to the cow. I am growing spring onions, beetroot, fennel and celeriac. The peas I planted are really stunted and I have only had about 20 pods from them.  I have got my first planting of Summer veg in and we will see how that goes.

Some Summer Veg are in

Create - To fill a need or feed the soul. Create for ourselves or for others.
Creations have been on hold this month and reading has taken over but I have plans to pick up my crochet hook again in the next few weeks.

Discover Feed the mind by reading texts relevant to current interests.
I have been reading lots over the last month about dog training, the environment, farming and some back copies of the National Geographic which although are old are still fascinating.

Enhance Community
It is all systems go (only 8 weeks to go) in organising the car show that I am involved in and things are just getting busier and busier in this area.

Enjoy - Life! Embrace moments with friends and family. Marking the seasons, celebrations and new arrivals are all cause for enjoyment.
We had a few family get together's during the month and we caught up with some of Hubby's relatives we had not seen for 12 months.  I have also been spending quite a bit of time around our 5 month old nephew which has been lovely.
I also got to spend the day with a friend who I have note seen for over a year and meet her 4 month old for the first time.  It was a real joy to see her and her new babe and how much her now 3 year old had grown.


What have you been up to?

Monday 1 September 2014

The Weekend Kitchen - Marmalade and Sausage Rolls

We had the most glorious weather over the weekend so most of my time was spent out doors.
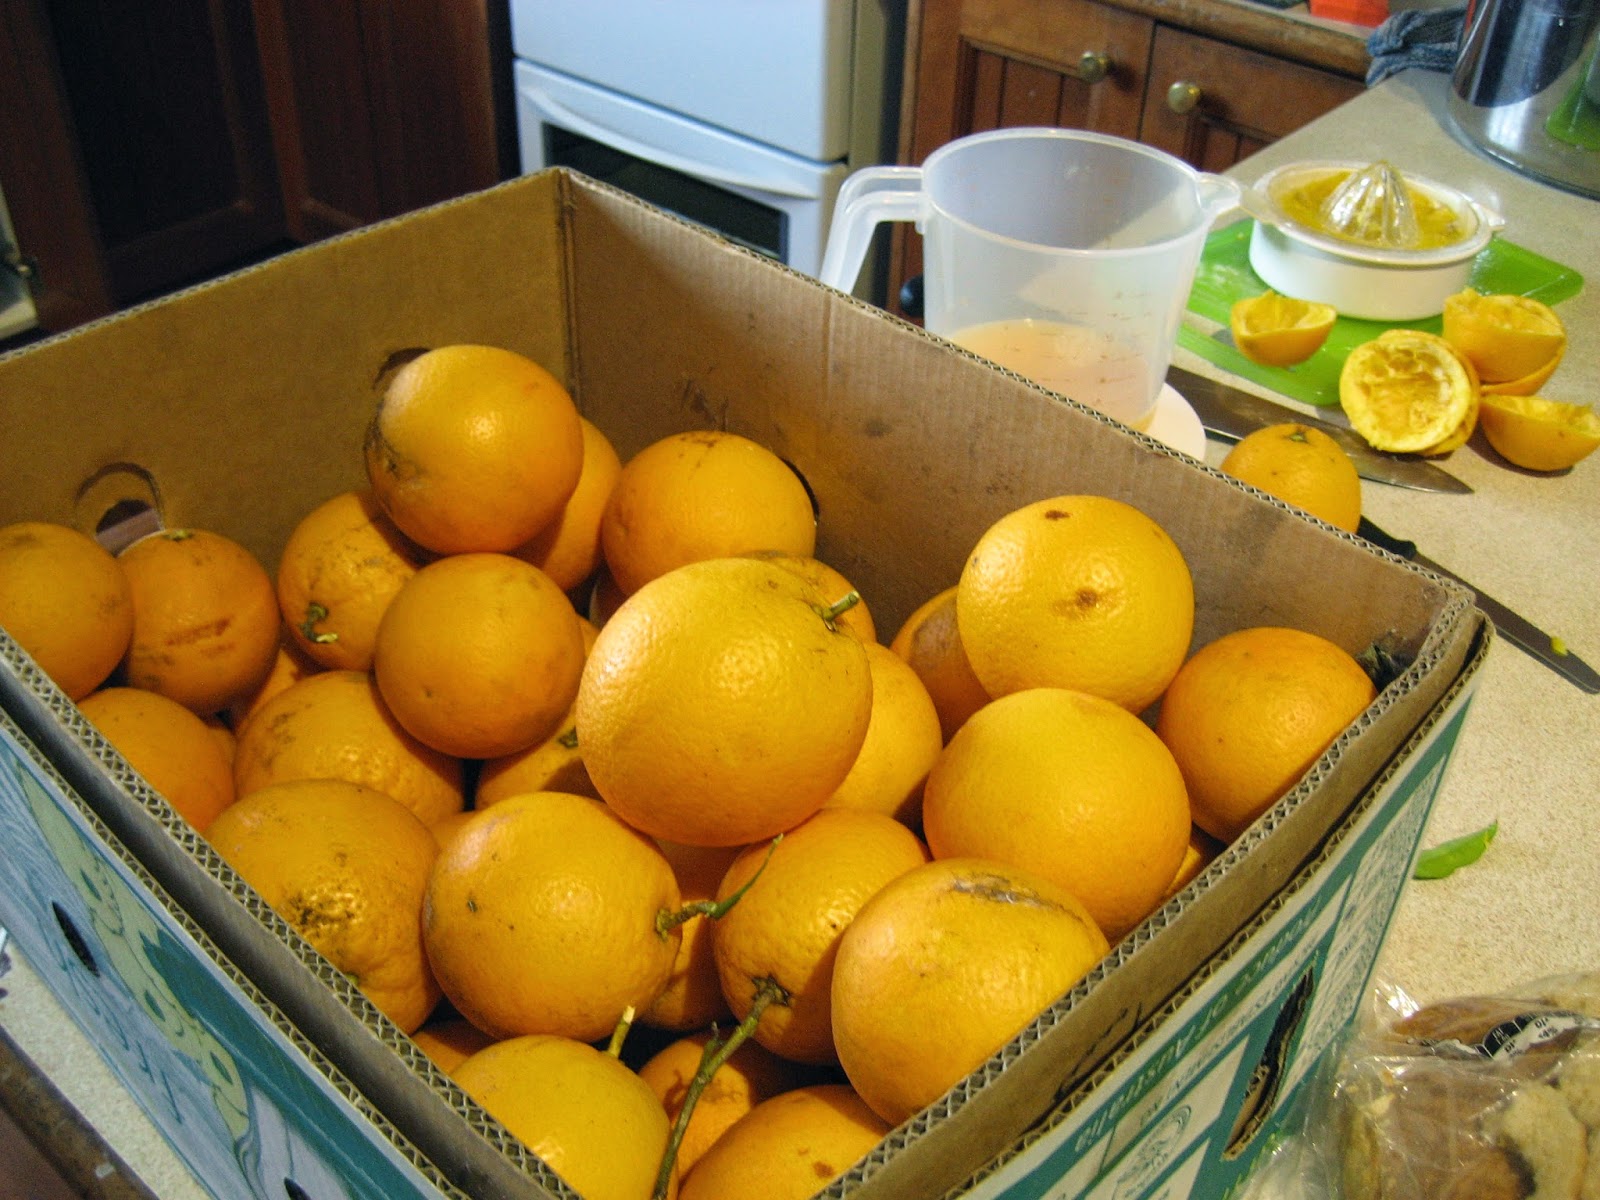
Hubby had to work on Saturday but when he came home he brought with him a box full of oranges and a bag of avocados that the client had given him.  The client also gave him a bag of oranges last week too so we have been juicing them and enjoying them fresh every day.  I am not sure what kind of orange they are but they are really juicy and sweet but also a bit tart which is just how I like oranges.

I have started making a dent in the box of oranges


So I decided it was time to make an Orange and Almond Cake and some marmalade for my father in law for fathers day.

Gluten Free Orange and Almond Cake

Orange Marmalade (I am waiting on a verdict from my father in law)

Then I made some beef sausage rolls which made for an easy dinner with salad and will give Hubby something different to have in his lunch box this coming week.


I will post the recipes over the next few days in case you too are lucky enough to have a glut of oranges or want to try making your own sausage rolls.
What did you get up to in the kitchen over the weekend?